Organic Ingredients, Not Always Necessary

We all know that pesticides are not good for our bodies. The exposure to toxic chemicals can have an even more adverse effect in children. The metabolism of a fetus, infant and child is less able to metabolize and inactivate toxic chemicals, being more vulnerable to the harmful effects of pesticides.
Consuming organic food minimizes the problem, but it is generally expensive, and not accessible to everybody. The Environmental Working Group developed a list of vegetables and fruits that contain the highest amount of pesticides, and the ones that are generally clear. So, be wise and don't spend the extra cash when not necessary.
Rank starting with the fruits and veggies with the highest load of pesticides:

Dirty Dozen:
  1. Celery {highest load of pesticides}
  2. Peaches
  3. Strawberries
  4. Apples
  5. Blueberries
  6. Nectarines
  7. Bell Peppers
  8. Spinach
  9. Cherries
  10. Kale/Collard Greens
  11. Potatoes
  12. Grapes (Imported)
 Clean Fifteen:
  1. Onions {lowest load of pesticides}
  2. Avocado
  3. Sweet Corn
  4. Pineapple
  5. Mangos
  6. Sweet Peas
  7. Asparagus
  8. Kiwi
  9. Cabbage
  10. Eggplant
  11. Cantaloupe
  12. Watermelon
  13. Grapefruit
  14. Sweet Potato
  15. Honeydew Melon
  Source: EWG

Eco.Logical.Mom, a Wisconsin Blog, Rated One of the Best Websites and Blogs for Parents.

Contact: Renata Lerch
(414) 243-0192
renata@limalerchconsulting.com

FOR IMMEDIATE RELEASE

Eco.Logical.Mom, a Blog from Wisconsin, Has Been Rated One of the Best Blogs and Websites for Parents.
Brookfield, WI, October 16, 2009 - Eco.Logical.Mom, a blog from Wisconsin that provides information about raising kids with a healthy and eco-friendly lifestyle, has been rated one of the best websites and blogs for parents in its category. The Stroller Traffic publication (stroller traffic.com) released the results on October 13, 2009.

"I'm thrilled with the recognition", said Renata Lerch, founder and publisher of Eco.Logical.Mom. "We've worked hard to provide valuable information to parents about raising kids with a healthy and eco-friendly mindset. It's our contribution to the future of our environment, and being acknowledged for that is superb."

The site, ecologicalmom.com, offers helpful but non-wrist-slapping advice on healthy family living, from eating healthy and being active, to protecting the environment. It also features easy-to-make homemade food recipes, tips for traveling with kids, and news about living a meaningful lifestyle.

For more information about Eco.Logical.Mom, logon to ecologicalmom.com, or e-mail us at ecologicalmom@ymail.com. For details about Stroller Traffic's results for best websites and blogs, logon to strollertraffic.com/index.php/traffic-log/article/the-cookie-crumbles/

Press


October 2009 - Eco.Logical.Mom rated one of the Best Blogs and Websites for Moms by Stroller Traffic.


December 15, 2009 - EcoLogical Mom is now providing content for MilwaukeeMoms.com


February 8, 2010 - EcoLogical Mom featured on Best Green Blog


July 23, 2011 - EcoLogical Mom featured on Sassy Little Cabbages


August 25, 2011 - EcoLogical Mom featured on Too Much Time on My Hands


Click here to access PRESS RELEASES

How to Start an Organic Garden

Preparing the Soil
In order to get the best results with your new organic garden, you'll want to make sure the soil is properly conditioned. You have to eat, and so do plants, so make sure your veggies get lots of fresh nutrients. Good healthy soil helps build up strong, productive plants. Chemical soil treatments can not only seep into your food, but they can also harm the beneficial bacteria, worms and other microbes in the soil.

The best way to gauge the quality of your soil is to get it tested. You can get a home testing kit, or better, send a sample to your local agricultural extension office. For a modest fee you'll get a complete breakdown of pH and nutrient levels, as well as treatment recommendations (be sure to tell them you're going organic). That way you can tailor your gardening program. Typically, it's best to test in the fall, and apply any organic nutrients before winter.

Even if you don't have time for testing, you'll want to make sure your soil has plenty of humus -- the organic matter, not the similarly named Mediterranean spread. According to 1000 Gardening Questions & Answers, you'll want to mix in compost, leaf and grass clippings and manure. Manure should be composted, unless you aren't going to harvest or plant anything for two months after application. Preferably, get your manure from local livestock that have been organically and humanely raised -- and never use manure from animals that eat meat.

Read more: http://www.thedailygreen.com/green-homes/latest/organic-gardening-tips-460309#ixzz0SQQYMyQU

Great Finger Foods

finger food 2 (2)

Around 9 to 10 months of age, a baby has developed enough motors skills to allow her to use the fingers to pick up food. This is a good time to start introducing finger foods. Kids usually have fun and enjoy developing their independence at this age, and this will work as a transition to eating with utensils at a later stage.

Fruits and vegetables make great finger foods. Variety will keep it fun and challenging for them!

As a rule of thumb, pieces should be small, soft and well cooked. It should melt in the mouth, at this stage they are not ready to eat chewy pieces for too long.

Good examples of fruits (raw or cooked): banana, apple, strawberry, mango, peach, plum and avocado

Vegetables (well cooked only): broccoli, carrots, zucchini, peas, green beans, asparagus and potatoes

Meats (well cooked only): little pieces of boneless chicken (breast or thigh), turkey breast

Processed carbs: whole grain cookies and cakes

For kids ages 4 and older, homemade granola bars are a great option for a nutritious snack. Try the recipe below:

  • Fruit and Oat Granola Bar

-1 organic egg

-1 egg white

-3/4 cup light brown sugar

-1 tblspoon canola oil

-1 tblspoon cinnamon

-1/4 tblspoon salt

-1 tblspoon good quality vanilla extract

-1 1/2 cups toasted oats

-2/3 cup dried cranberries, chopped

-1/4 cup pecans, chopped

-1 tblspoon all-purpose flour

Preheat over to 350 degrees F. Spread oats on a baking sheet and bake, stirring occasionally, for 15 to 18 minutes, until lightly browned.

Reduce oven temperature to 325 degrees F. Line and 8x11" pan with foil. Lightly oil or coat with nonstick spray.

In a large bowl, whisk the eggs, brown sugar, oil, cinnamon, salt and vanilla extract. Stir in toasted oats, dried cranberries, pecans and flour.

Spread in prepared pan and bake for 30 to 35 minutes. Cool, cut into bars with a lightly oiled knife.

Preparation time: about 30 minutes

Nutritional value: (based on individual servings)
Calories: 130
Total Fat: 2 g
Cholesterol: 14 mg
Sodium: 50 mg
Carbohydrates: 24 g
Protein: 2 g

Source: Daily Green


Fruit Recipes (Stages 1 and 2)

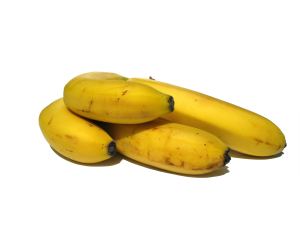
banana


Stage 1

Some moms believe that fruits should be introduced a couple of weeks after the vegetables. The reason is purely taste! Fruits are sweeter and babies may not like vegetables if introduced to fruits first.

Good options to introduce fruits are apples, pears, bananas, avocado, papaya, plums and prunes.

  • Homemade Apple Sauce (add pears for a great taste and variety!)

- 6 Red Delicious apples

- 2 cups of water

Wash thoroughly the apples. Peel and slice them, getting rid of the core. Boil in water for about 15 minutes. Remove the pan from the stove. Don't throw the water away, it contains several minerals and vitamins. Blend the content with a hand mixer, or a blender until it turns into a smooth paste.

Add iron fortified cereal (whole rice or oatmeal) if desired.

Preparation time: about 25 minutes.

Nutritional value: high in vitamins A and C, potassium and fiber.

  • Mashed Bananas with Cereal and Formula or Yogurt

- 1 banana

- 1 teaspoon of rice or oatmeal cereal

- 1-2 teaspoons of formula or yogurt (only if your baby has already been introduced to yogurt!)

Peel the banana and mash with a fork. Add the formula/yogurt and stir. Add enough cereal until desired consistency.

Preparation time: about 5 minutes.

Nutritional value: high in potassium, magnesium, calcium and folate (vary by chosen ingredients).


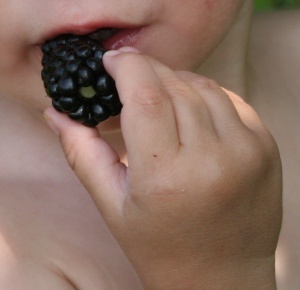
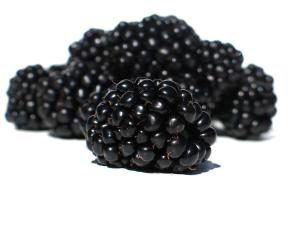
blackberry

Stage 2

  • Berry Banana Shake

- 1 banana

- 5 oz. organic whole milk or formula

- 6-8 pitted cherries, and/or 2 tablespoons or blueberries (you can use frozen berries or cherries)

Peel the banana and wash the cherries and/or berries. Mix them all in a tall container. Add the milk or formula. Blend the ingredients using a hand mixer, or a blender. Pour the mix into a sippy cup. You may need to use a strainer otherwise the small pieces may clog the spouts/straws. Babies absolutely love this shake!!

Preparation time: about 5 minutes.

Nutritional value: high in antioxidants, potassium, calcium and protein (vary by chosen ingredients).

  • Finger Breaded Banana (you can use other fruits too!)

- 1 banana

- 1 tablespoon of iron fortified whole rice or oatmeal cereal

Peel the banana and cut it in cubes small enough to be picked up by baby's little fingers. Spread the cereal on a small plate and toss the banana cubes on it, covering each cube entirely. This will allow the baby/toddler to easily pick up the cubes without sticking to his/her fingers.

Preparation time: about 5 minutes.

Nutritional value: high in potassium, magnesium and iron (vary by chosen ingredients).


Veggies and Legumes recipes (Stage 2)

tomate

Stage 2 is appropriate for babies older than 8 months.
  • Mashed Broccoli

- 1 lb. organic broccoli

- 1 1/2 - 2 cups of water

Wash thoroughly the broccoli florets with water. Cut the florets and stems in pieces and boil in water.

After about 20 minutes poke them with a fork. When the stems are very soft and tender, remove the pan from the stove. Don't throw the water away, it contains several minerals and vitamins. Mash the content with a hand mixer, or a blender until it turns into a smooth paste.

Preparation time: about 30 minutes.

Nutritional value: high in vitamin C, antioxidants, and fiber.

  • Mashed Azhuki, or Black Beans (recipes also valid for Split Peas, Chick Peas and Lentils)

- 1 lb. dry organic Azhuki or Black Beans

- 4 cups of water

Wash thoroughly the beans with water. Soak the beans in water overnight to drastically reduce the cooking time.

The day after, cook the beans with water for 40-45 minutes. Add more water as it dries up. When the beans are very soft, remove the pan from the stove. Mash the content with a hand mixer, or a blender until it turns into a smooth paste.

Preparation time: about 30 minutes.

Nutritional value: high in Iron, protein, folate, potassium and fiber.

  • Chicken or Turkey Breast

- 1 lb. organic chicken or turkey breast

- 1 1/2 - 2 cups of water

Wash thoroughly the breasts with water. Cut them in pieces and boil in water.

After about 20 minutes check to make sure they are fully cooked. Remove the pan from the stove. Don't throw the water away, it is a delicious chicken stock! Puree the breasts with the stock using a hand mixer, or a blender until it turns into a smooth paste.

Preparation time: about 30 minutes.

Nutritional value: high in protein and fiber

  • Salmon or Trout

- 1 lb. Salmon or trout filets

- 1 1/2 - 2 cups of water

Wash thoroughly the filets with water. Make sure there are no bones. Boil the filets in water.

After about 15 minutes check to make sure they are fully cooked. Remove the pan from the stove. Don't throw the water away, it is a delicious fish stock! Puree the filets with the stock using a hand mixer, or a blender until it turns into a smooth paste.

Preparation time: about 20 minutes.

Nutritional value: high in protein and omega-3

  • Chicken, Asparagus and Zuchini with Herbs

- 1 lb. organic chicken breast

- 1/2 lb. organic asparagus

- 1/2 lb. organic zuchini (green and yellow)

- Oregano and parsley

- 2 cups of water

Wash thoroughly the chicken, the asparagus and the zuchini. Cut the chicken breasts, the zuchini and the asparagus in smaller pieces, and boil them all together in water, along with the herbs.

After about 20 minutes poke them with a fork. When the stems are very soft and tender, and the breasts are fully cooked, remove the pan from the stove. Don't throw the water away, it contains several minerals and vitamins. Blend the content with a hand mixer, or a blender until it turns into a smooth paste.

Preparation time: about 30 minutes.

Nutritional value: high in vitamin C, antioxidants, fiber and proteins.

  • Chicken, Sweet Potato and Cauli-Flower with Onion

- 1 lb. organic chicken breast

- 1/2 lb. organic sweet potatos

- 1/2 lb. organic cauli-flower

- 1 tablespoon of chopped onion

- 2 cups of water

Wash thoroughly the chicken and the cauli-flower with water, and the sweet potato with a brush. Cut the chicken breasts, the sweet potato with the skin, and the cauli-flower in chunks of an inch approximately. Boil them all together in water, along with the onion.

After about 20 minutes poke the pieces with a fork. When the sweet potato is very soft and tender, and the breasts are fully cooked, remove the pan from the stove. Don't throw the water away, it contains several minerals and vitamins. Peel the sweet potato with your fingers. Don't use the skin. Blend the content with a hand mixer, or a blender until it turns into a smooth paste.

Preparation time: about 30 minutes.

Nutritional value: high in vitamin C, betacarotene, antioxidants, fiber and proteins.

  • Broccoli with Cheddar Cheese (yummy!)

- 1 lb. organic broccoli

- 3 to 4 oz of cheddar cheese

- 1 cup of water

Wash thoroughly the broccoli with running water. Cut the broccoli into chunks, both florets and stems. Boil the pieces in water.

After about 10 minutes poke the pieces with a fork. When the stems are soft and tender, remove the pan from the stove. Don't throw the water away, it contains several minerals and vitamins. Shred the cheese, or cut it into small cubes, and add to the boiled broccoli. Wait until it melts with the heat of the cooked broccoli. Blend the content with a hand mixer, or a blender until it turns into a smooth paste.

Preparation time: about 15 minutes.

Nutritional value: high in vitamin C, antioxidants, fiber, calcium and proteins.

  • Napa Cabbage with Onion and Eggs

- 1 1/2 lb. organic napa cabbage

- 1/2 small organic onion

- 2 large eggs

- 1 cup of water

Wash thoroughly the napa cabbage with running water. Chop the napa cabbage into 1/4 inch slices, and dice the onion. Boil both ingredients in water.

After about 10 minutes stir thoroughly. When the cabbage is soft and tender, throw both eggs (yolk and whites). Stir it again, breaking the eggs, mixing all ingredients. Remove the pan from the stove. Don't throw the water away, it contains several minerals and vitamins. Blend the content with a hand mixer, or a blender until it turns into a smooth paste.

Preparation time: about 20 minutes.

Nutritional value: high in vitamin A, C, folate, iron, protein and calcium.

  • Organic Brown Rice and Beans (Great source of Protein!)

- 1 lb. organic beans (brown or black)

- 1 cup of dry brown rice

- 1/4 gallon of water

Wash thoroughly the beans. Soak it in water overnight to reduce time on the stove.

Boil the beans with the water in a large pan for about an hour, until the beans are soft. Add the brown rice and let it cook for another 15 to 20 minutes, or until the rice is cooked. Stir from time to time to make sure the beans don't burn at the bottom of the pan. Remove the pan from the stove and let it cool off.

Blend the content with a hand mixer, or a blender until it turns into a smooth paste.

Preparation time: about 1 to 2 hours, depending on how long beans were pre-soaked.

Nutritional value: high in iron, calcium, proteins, fiber and carbohydrate.

Veggies and Legumes Recipes (Stage 1)

Stage 1 is appropriate for babies 6-8 months, during the initiation to solid foods.

All recipes suggest the use of organic ingredients. If you can, opt for organic food, especially when your little one is growing so quickly!

For a list of non-organic vegetables and fruits with the highest and lowest load of pesticides available in the market, please click here.


  • Sweet Potato (very nutritious and babies love it!!)

- 1 lb. organic sweet potato

- 3 cups of water

Wash thoroughly the sweet potatoes with a brush. Don't peel them. Cut them in pieces and boil in water.

After about 20-25 minutes poke them with a fork. When the pieces are very soft and tender, remove the pan from the stove and wait until it cools off. Don't throw the water away, it contains several minerals and vitamins. When the pieces are cold enough, peel them, get rid of the skin. Mash or blend the peeled pieces in the water you used to boil them. Using a hand mixer, or a blender will make it very smooth for the baby.

Preparation time: about 30 minutes.

Nutritional value: high in beta carotene (it is orange!), vitamin A, and potassium. Also contains calcium, folate and vitamin E.

  • Cauliflower

- 1 lb. organic cauliflower

- 1 1/2 - 2 cups of water

Wash thoroughly the cauliflower with water. Cut the florets and stems in pieces and boil in water.

After about 15 minutes poke them with a fork. When the stems are very soft and tender, remove the pan from the stove. Don't throw the water away, it contains several minerals and vitamins. Blend the content with a hand mixer, or a blender until it turns into a smooth paste.

Preparation time: about 25 minutes.

Nutritional value: high in vitamin C, A and Calcium.

  • Carrots

- 1 lb. organic carrots

- 2 cups of water

Peel the carrots and wash them thoroughly with water and a brush. Cut the carrots in chunks and boil in water. You can also use a steamer basket.

After about 20 minutes poke them with a fork. When the carrots are soft, remove the pan from the stove. Get rid of the water, it contains nitrates* that are not suitable for babies. Blend the carrots with about 1 cup of mineral water using a hand mixer, or a blender until it turns into a smooth paste.

Preparation time: about 25 minutes.

Nutritional value: high in beta carotene, vitamins A, C and Calcium.

*Organic foods are grown without the use of commercial nitrate fertilizers, therefore the risk of nitrate concentration is minimized. By the time a baby is six months old, its digestive system is fully developed, and the amount of hydrochloric acid in a baby's stomach kills most of/or all the bacteria that convert nitrate to nitrite. In older children and adults, nitrate is absorbed and excreted.
  • Squash

- 1 lb. organic squash (Butternut, Acorn or Winter)

- 2 cups of water

Cut the squash in half and remove all seeds. Wash it thoroughly with water and a brush. Bake it for about 50 minutes in a pan with about 1 inch of water. Set the oven to 400 degrees F. Poke the flesh with a fork. When it is soft, scoop it from the skin and blend with enough mineral water to make a smooth paste.

Preparation time: about 60 minutes.

Nutritional value: high in calcium, potassium, vitamin A, carbohydrates and fibers.

  • Green Beans

- 1 lb. organic green beans

- 1 1/2 cups of water

Wash thoroughly the green beans with water. Boil or steam the beans for about 15-20 minutes, until tender consistency. Remove the pan from the stove. Don't throw the water away, it contains several minerals and vitamins. Blend the content with a hand mixer, or a blender until it turns into a smooth paste.

Preparation time: about 25 minutes.

Nutritional value: high in vitamin C, A, and calcium, potassium and iron.

  • Sweet Peas

- 1 lb. organic peas (natural or frozen)

- 1 - 1 1/2 cups of water

Wash thoroughly the peas with water. Add the water and boil. After about 15 minutes poke them with a fork. When they are tender, remove the pan from the stove. Don't throw the water away, it contains several minerals and vitamins. Blend the content with a hand mixer, or a blender until it turns into a smooth paste.

Preparation time: about 25 minutes.

Nutritional value: high in vitamin C, A, B and calcium, potassium and phosphorus.

Contact & Advertise


Advertising:
We offer flexible advertising options to qualified sponsors and advertisers. Our audience is very targeted, composed of highly educated and affluent eco-friendly parents. Our website traffic is also supported by thousands of visitors coming daily from our social media and targeted partnerships. 
Please e-mail us to discuss advertising opportunities.

Visitors & Contributors:
If you have suggestions of topics, recipes and/or products that could be useful to other Eco&Logical moms and dads, please do not hesitate to contact us. We really enjoy learning about other people's experiences, and sharing them with readers.
You can be a contributor to EcoLogicalMom.com. Just e-mail us your content and we'll contact you.
We read every e-mail, and respond as quickly as possible!

Please e-mail us at EcoLogicalMom (at) ymail.com

Thanks

Eco.Logical.Mom Team
www.EcoLogicalMom.com
www.twitter.com/EcoLogicalMom
www.facebook.com/EcoLogicalMom
EcoLogicalMom (at) ymail.com


© Ecologicalmom.com 2009-2010. All Rights Reserved.
Information in this website is not meant to be taken as medical advice, we are not licensed medical physicians; the information presented should not replace the medical advice of your doctor or pediatrician. Contents may not be reproduced for other use without the express written consent of ecologicalmom.com.

Useful Links

Green Tips to Save Resources at Home and Office (and save you some cash)

folha verdeSaving resources is not only good for the environment, but also great for you and your family. Your kids see their parents as role models. Our daily attitude will teach them how to take care of themselves and the environment, respecting our community.

Click on the links below for great and easy tips to save money and resources at home, office and on the road:

What you can do at home

What you can do at the office

What you can do on the road

Check out the Consumer Report for Greener Choices of Products

There are so many ways to improve the quality of our planet. It is as easy as setting ourselves a goal to implement one smart green change a month! We can do it!

___________________________________________________________________________

Travel Packing: Check List for Babies and Toddlers

Bringing a baby or a toddler to a domestic or international trip is fun but requires some serious preparation, andpassaporte e woman additional equipment. Having an umbrella stroller is very helpful to navigate through airports, and at destinations. Also, bringing some comfort food items, such as cereal or Cheerios, can be a huge plus while the little one gets acquainted with different food. Depending on where you are staying, bringing a portable crib, such as the Pack & Play can be very useful, and is usually light enough to carry around.

Another very valuable item is a large diaper changing mat. You can buy a piece of fabric that is water proof on one side, and cushioned on the other. That allows you to change diapers anywhere. Many countries lack the convenience of public restrooms' changing tables. Now for the small items:

Minimum carry on luggage: diaper bag with diaper, rash cream, wipes, extra pants, t-shirts (for mom and dad too, in case of an accident) and sweater, blanket, socks, pacifier, toys and books, bib, spoon, bowl, enough food for the flight or road trip hours, sippy cup and water for taking off and landing (the cabin pressure can be painful for those little ears).

Minimum checked luggage: baby monitor, washcloth, body wash, thermometer, Mylicol, sunscreen, cotton balls and swabs, nail clipper, diaper, rash cream, brush (tooth and hair), changing mat, nasal aspirator, Tylenol, nasal saline solution, bottles, sippy cups, spoon, bowl, bibs, cereal, enough food such as cheerios, organic jarred food for a couple of days, pacifier, toys and books, bug repellent, and enough clothing.

Checkout my posting for additional travel packing tips.

Baby Food Recipes

Pediatricians recommend the introduction of solid foods at 6 months of age, although some doctors are ok with starting it a couple of months earlier. We think that breastfeeding at least until 6 months of age provides the ideal nutrition for babies.

Homemade solid foods for babies are the easiest to make, and a lot more nutritional than jarred foods. Preparing one single vegetable, legume, chicken, or fruit each time is very simple and fast. A very easy technique is to freeze the food in cubes, like ice cubes, and defrost 3-5 cubes per meal. Make sure you mix different flavors each meal for outstanding nutritional value, including a protein (chicken, fish, etc), a green and a yellow vegetable, legumes, and grains.


Freezing Baby Food is Very Easy!

All you have to do is boil or roast the veggies, legume, grains, etc, and blend it with a bit of water (see recipes below). Transfer the content to clean and sanitized ice cube trays. You can buy cube trays specifically made for baby food at baby stores. They come with a cover (e.g.kidco trays). Or, if you use regular ice cube trays, cover them with a plastic film before placing them in the freezer.

Sanitizing the ice cubes is important, and easily done through the dishwasher.

After about 10-15 hours in the freezer, the content is frozen. It is time to transfer the cubes to a labeled and dated plastic bag. Store in the freezer. We recommend using it for a month to guarantee freshness and taste, however several sources confirm that it is safe to freeze the food for 3 months without any problem.


Veggies and Legume Recipes (Stage 1)

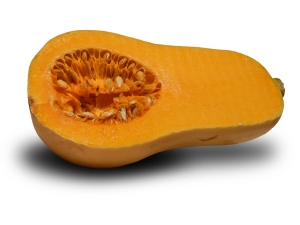
1158683_butternut_squash_3

Stage 1 is appropriate for babies 6-8 months, during the initiation to solid foods.

All of our recipes suggest the use of organic ingredients. If you can, opt for organic food, especially when your little one is growing so quickly! (Scrow all the way down for a list of non-organic vegetables and fruits with the highest and lowest load of pesticides available in the market).

Click here to see all Stage 1 recipes.


Veggies and Legumes Recipes (Stage 2)

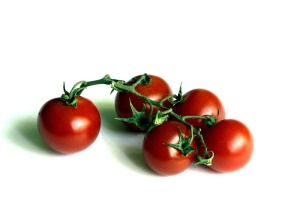
tomate
Stage 2 is appropriate for babies older than 8 months.

Click here to see all Stage 2 recipes.


Fruits (Stages 1 and 2)

banana

Some moms believe that fruits should be introduced a couple of weeks after the vegetables. The reason is purely taste! Fruits are sweeter and babies may not like vegetables if introduced to fruits first.

Good options to introduce fruits are apples, pears, bananas, avocado, papaya, plums and prunes.

Click here to see all Fruit Recipes (Stages 1 and 2).


Great Finger Foods

finger food 2 (2)

Around 9 to 10 months of age, a baby has developed enough motors skills to allow her to use the fingers to pick up food. This is a good time to start introducing finger foods. Kids usually have fun and enjoy developing their independence at this age, and this will work as a transition to eating with utensils at a later stage.

Click here to see all Finger Food recipes.


Organic Ingredients, Not Always Necessary


We all know that pesticides are not good for our bodies. The exposure to toxic chemicals can have an even more adverse effect in children. The metabolism of a fetus, infant and child is less able to metabolize and inactivate toxic chemicals, being more vulnerable to the harmful effects of pesticides.

Consuming organic food minimizes the problem, but it is generally expensive, and not accessible to everybody. The Environmental Working Group developed a list of vegetables and fruits that contain the highest amount of pesticides, and the ones that are generally clear. So, be wise and don't spend the extra cash when not necessary.

Click here to see the rank of fruits and veggies with the highest and lowest load of pesticides.


Fish and Mercury: What to Avoid


We keep hearing about high mercury levels in fish, but always wondered which ones are safe to consume. The Environmental Working Group released a useful list of what to eat, and when.

Click here to access the list.


© Ecologicalmom.com 2009. All Rights Reserved.

Information in this website is not meant to be taken as medical advice, we are not licensed medical physicians; the information presented should not replace the medical advice of your doctor or pediatrician. Contents may not be reproduced for other use without the express written consent of ecologicalmom.com.

Eco & Logical Picks

Here is a list of a few eco & logical products that have been useful for us and our families. We have no commercial agreements with any company or dealer that sell or manufacture these products and services.

gdiaper
G-Diapers
Earth-friendly, semi-disposable diapers. Great concept! Requires some practice, but works pretty well! For more information, check out their site at gdiapers.com


Patemm Pad

A smart and practical solution to the diaper bag. Its round design accommodates squirmy infants and serves as a sleek, all-in-one carrier for diapers, wipes, and even a change of clothes. Patemm.com.


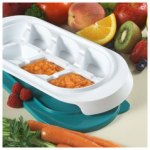
freezer tray
Baby Food Freezer Trays
These BPA-free trays are very useful to freeze homemade baby food. There are a few brands available in the market.
The one we use is from Kidco, Inc.
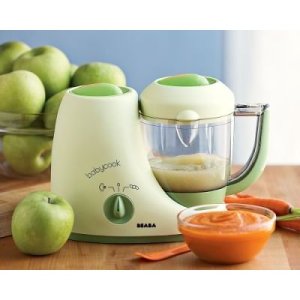
beaba food processor
Beaba Baby Food Processor
The Beaba Babycook is a one-of-a-kind, compact countertop appliance that functions as a steamer, blender, warmer and defroster to prepare fresh, healthy meals for baby. It starts by steam cooking vegetables, fruits and meats in less than 15 minutes, while preserver their vitamins and flavors. It then purees and blends them to the desired consistency. It can also be used to quickly reheat or defrost precooked foods. A bit pricey but definitely worth it!

By Beaba

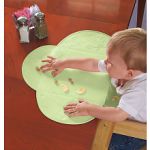
kiddopotamus
Diner Placemat
This placemat is wonderful to keep in your diaper bag. It allows our toddler to have a clean surface to eat from at restaurants. Perfect for travelers as well. It is made of a durable material that can be washed countless times. It stays in place with seven strong suction cups, and it contains the mess with its rimmed edges. The scoop catches spills before they land on the child's lap. After meals, it folds, then rolls into the scoop and easily tucks into diaper bag so it is always available when eating on the go. I'm not sure how many options of brands are available in the market. The one we use is from Kiddopotamus.
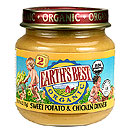
earths best
Earth's Best Organic Food
When we travel, we usually take a few of those containers for the flight and first day, while we are settling in at our destination. We save the containers. They are very useful to store frozen food. The meals are organic, and contains no preservatives, salt, sugar or artificial flavors and colors.

By Earth's Best
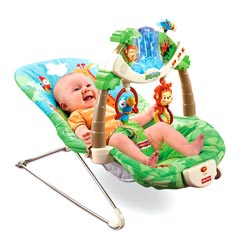
bouncychair
Bouncer Chair
God bless who created the Bouncer Chair! That is the best invention ever. Infants and young toddlers can spend hours entertaining themselves in it. One of our best picks for sure! Several brands available in the market.

By Fischer Price
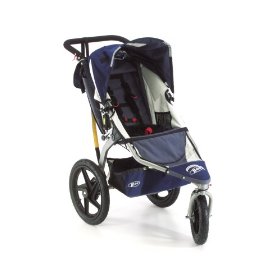
bobstroller
All-Terrain Stroller
This “all-terrain” type of stroller works really well. It is a bit heavy to take on trips, but a great gear to have in the city. The wheels are big and wide, so riding it on smooth or rough pavements is a breeze. And the suspension keeps the little one comfortable anywhere. Its large canopy protects our son against rain or sun.

By BOB
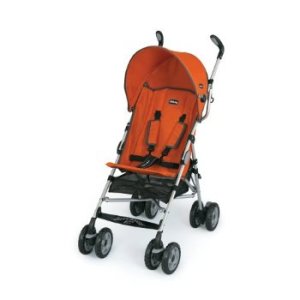
chicco umbrella stroller
Umbrella Stroller
Our Chicco Umbrella Stroller C6 has been to several international and domestic trips. It is light, goes really well at airports, sand, grass, concrete, you name it! It comes with a carry bag with a strap that makes travel a breeze.

By Chicco

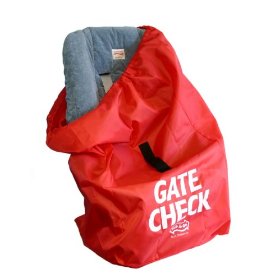
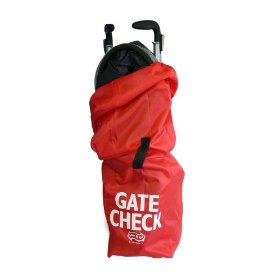
gate check car seat baggate check stroller bag
Gate Check Bags
If your umbrella stroller or car seat doesn't come with a gate check bag, you definitely need to buy one before your next flight! Protecting these items from dust, dirt and mold from the airline cargo compartment is a very wise idea. These ones fold compactly to fit in a small attached pouch that's sized to carry in a purse or diaper bag, and they a lot cheaper than branded versions.

By  JL
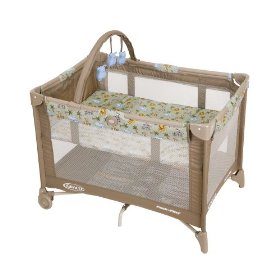
Pack&Play
Travel Crib
This potable crib can be easily carried all over the world! It is also useful at home, serving as a bassinet, in early stages, or a contained space for young toddlers. There are several brands available in the market; Graco's Pack&Play and Baby Bjorn are the most famous. Baby Bjorn is a bit pricey, like all of their products, but claims to be the most portable of all brands.

By Graco


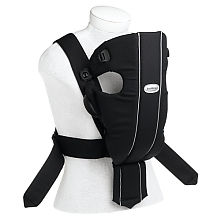
baby bjorn
Baby Carrier
Baby carriers are very comfortable for the parent and the baby, and most important, hands are free! When the baby is a little older and has a stronger neck, the neck rest can be folded down so that the child can face forward and look around. We used it comfortably until age 1. Very useful for walks and trips! Several brands available. We tested the product manufactured by BabyBjorn.
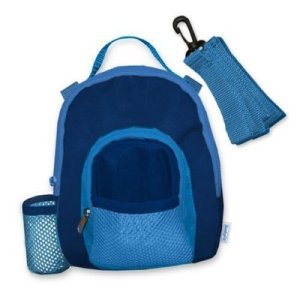
backpack harness
Toddler Harness
A must for toddlers' parents, specially at airports, parks, museums.... Keeps you, parent, sane! We found that stuff animal harnesses are cute, but the backpack version is a bit more useful.


© Ecologicalmom.com 2009. All Rights Reserved.
Information in this website is not meant to be taken as medical advice, we are not licensed medical physicians; the information presented should not replace the medical advice of your doctor or pediatrician. Contents may not be reproduced for other use without the express written consent of ecologicalmom.com.

Active Lifestyle

Exercising is incredibly important in life. It should be part of our daily routine!
Finding some activities that are pleasurable, fun and enjoyable to do while burning some calories and building up those muscles is key. Exercising is like a relationship for life. You need to work on that, making sure it doesn’t get boring!
Involving your kids in the activities is a good way to do it. Kids like to imitate their parents, seeing them as role models. Living a healthy lifestyle will help them build their own active routines.
There are several ways to involve your kids, from power walking with a stroller, to playing sports, swimming, or simply long walks. Just be creative and enjoy the fun!


Power Walking with a Stroller:

Walking at a fast pace with a stroller is a very good way to exercise. It helps you burn more calories by speeding up the metabolism while strengthening and toning the upper and lower leg and glutes muscles. You can also add several strength exercises with the help of the stroller. The idea is to have a full workout while enjoying the company of your kids.
You can start with about 30 minutes of exercise, and increase the length of your intervals as you improve your fitness. Exercising 5 times a week is ideal!
First you need to make sure your stroller is safe for your little one at a faster speed. You will also need comfortable clothes and good running shoes for yourself.
- Warm up for about 10 minutes by pushing the stroller as you walk.
- Stretch your legs and arms for about 5 minutes.
- Now speed up your walk, at a pace that is just slightly uncomfortable but enough to carry a conversation. Try to keep your pace for 20-30 minutes to start with.
- Find a safe place for a quick stop for the first set of strength exercises. Using the stroller handles, do 20 squats at a slow pace. Stand with about hip or shoulder-width apart. Bend the knees and lower into a squat, keeping the knees in line with the toes. Lower down as far as you can, but never lower than 90 degrees, and push into the heels to go back to starting position.
- Back to power walk for another 15 minutes.
- Find another safe place for a quick stop and lunges! Using the stroller handles, do 20 lunges at a slow pace. Stand in a split stance, with feet about 3 feet apart. You want both knees to be at about 90-degree angles at the bottom of the movement. Bend the knees and lower the back knee toward the floor, keeping the front heel down and the knee directly over the center of the foot. Keep the torso straight and abs in as you push through the front heel and back to starting position.
- Back to your power walk for another 10 minutes.
- Find a safe place and comfortable place for some abs (maybe back home). You can lie down next to the stroller and a routine of abs. Follow your doctor's instructions on types and quantity of post-partum crunches suitable for you.
- Finish with a good Stretch
For video illustration, click on the links below!
Stroller Exercise video I
Stroller Exercise video II

Perfect Accessory for Power Walk Moms

pedometer
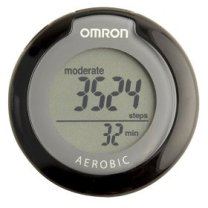
Pedometers are a great motivational tool to track steps as you walk your way through the day, and towards greater fitness. They are perfect for walking, and a great tool to help achieve a healthier, more active lifestyle. Most brands and models display the steps and minutes walked. Some models also calculate calories burned and the distance traveled.

Reducing or Eliminating the Mommy Tummy (Diastasis Recti)

woman exercising (2)
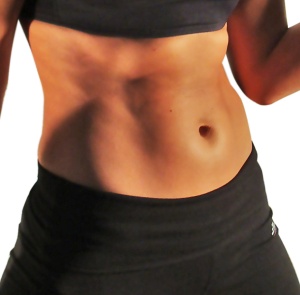
Diastasis recti is a separation between the left and right side of the rectus abdominis muscle, which covers the front surface of the belly area. In pregnant women, increased tension on the abdominal wall may lead to diastasis recti. It is commonly seen in women who have multiple pregnancies, because the muscles have been stretched many times.
Before starting your ab workout, you want to identify whether you have Diastasis Recti. It is very easy to find out. Lie down on your back with your knees bent. With your fingers pointing down, hold your fingers on your belly around the navel area. Press your fingers down as you lift your head, at your bellybottom, three inches above, and three inches below. That separation between the two sides of the ab muscle is the Diastasis. Click on the link below for a illustrative video.
Video how to identify your Diastasis Recti
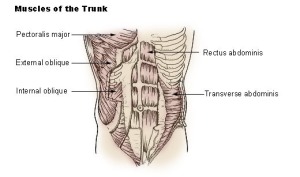
Do not do any cruches after pregnancy, which can make abdominal separation worse. First you need to strengthen your transverse abdominis to reduce or eliminate your ab muscle separation. The transverse compresses internal organs, flattening the abdominal wall (see illustration below). It will serve as a foundations for a more complete ab work.
It is never too late to eliminate or reduce Diastasis Recti. It can be done even several years after your pregnancy.

Illu_trunk_muscles
Knowing the level of your Diastasis Recti is key to choose the ideal ab program for you. Good ways to exercise your transversal are side planks , and keeping a great posture all day long. Below you will find a link to some effective transverse and oblique exercises, from recognized physical therapists. Have a great workout!
BeFitMom


Pregnancy and Postpartum Supporting Belts

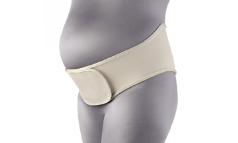
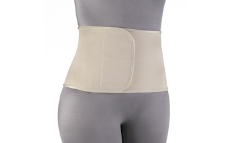
The elastic belts developed specifically for pregnancy (and postpartum) provide incredible support. I used the belts during the 3rd and 4th trimesters, every day. They were very helpful with supporting the back, compensating for the additional belly weight. The post-pregnancy belts are very helpful to help reduce the diastasis recti, providing great support for the back as well.
There are several brands available in the market. Below are just a couple from Medela, for illustration (pregnancy and postpartum versions).
belly beltpostpartum belt


Great Exercised to Do with a Baby or Toddler


family drawing
First, set the mood with some fun and energetic music. Also, the room should be safe enough to allow you and your baby or toddler to be on the floor, comfortably.
Here are some examples of effective exercises to do your your little one (s)
Lower body: Sets of squats, dips, lunges, step-ups, or step-downs holding your child as resistance. You can also leave your child on the floor, bassinet or stroller close to you while you make the movements.
Upper body: Sets of push-ups, triceps dips, biceps resistance weight lifting using weights or holding your baby with both arms up and down. You can use the same resistance to work your shoulders.
Abs: you can use a Swiss ball. Do some abs holding your baby on your lap (bouncing up and down is very entertaining for babies and toddlers!)
Check out the links below for videos with more examples of effective movements to make with your kids (they will love it!):
Video 1
Video 2

© Ecologicalmom.com 2009. All Rights Reserved.
Information in this website is not meant to be taken as medical advice, we are not licensed medical physicians; the information presented should not replace the medical advice of your doctor or pediatrician. Contents may not be reproduced for other use without the express written consent of ecologicalmom.com.